Categories
Tags
-
#main menu
#mini menu
#updates
#notifications
#messages
#settings
#friend's requests
#change contrast
#light to dark
#change font size
#light mode
#dark mode
#tutorial
#profile
#profile page
#profile settings
#info
#albums
#blogs
#forum posts
#Groups
#Discussions
#Members
#Polls
#Videos
#How to
#Photos
#blog
#blogging
#writing
#post editor
#font family
#font sizes
#upload
#add links
#preview
#chat
#IMC
#instant messaaging
#general
#privacy
#emails
#subscription
#change password
#networks
#album tutorial
#polls tutorial
#posting videos
#updates icon
#tutorial links
Archives
[Tutorial] How to write and use Tech's Realm Forums
-
Posted by TR Admin - Filed in Tutorial's - #forum posts #How to #writing #post editor #font family #font sizes #upload #add links #preview - 1,284 views
How to write and use Tech's Realm Forums.
Tech's Realm's Forum makes your discussion world even bigger by allowing an abundant amount of room for writing. Discussions of any sort of substance just don't work in a comments only setting. Tech's Realm has added a forum for your optimum experience in sharing information, debating topics, and to share your thoughts at any random moment.
To find Tech's Realm forum and best utilize it's benefits, you will find access to the forum at the top of your screen. Click on Forum.
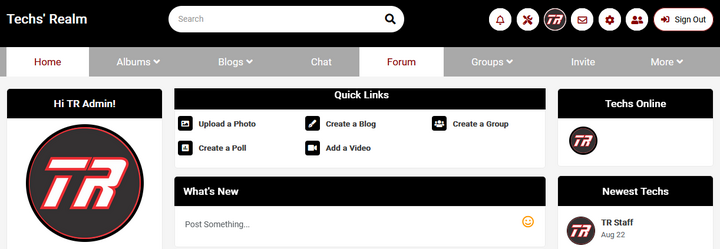
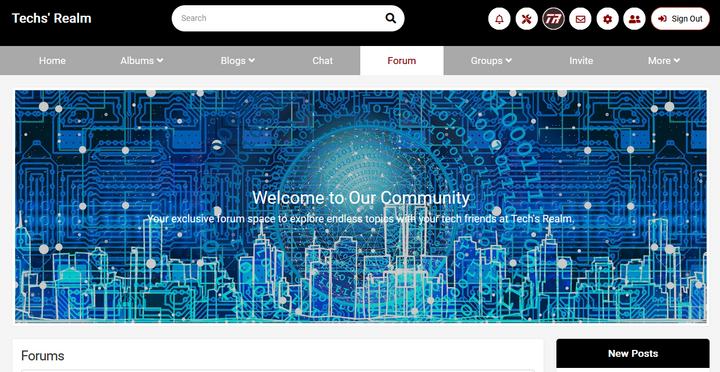
After you have clicked on "Forum" you now arrive at the Tech's Realm Forum page.
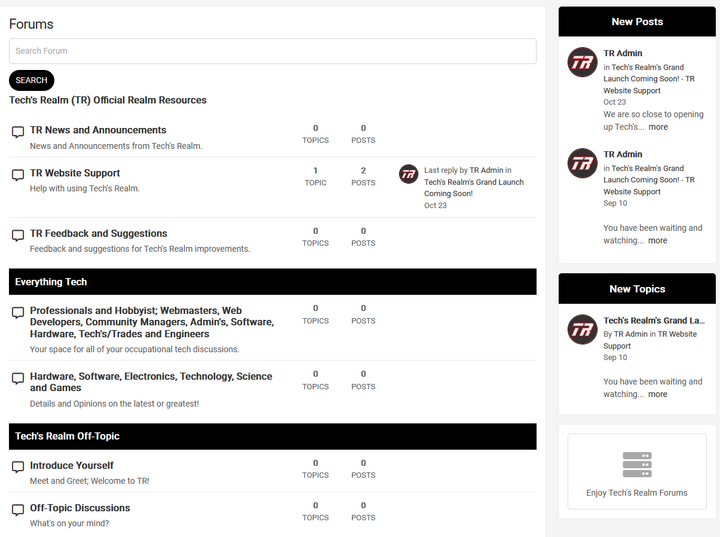
There are three main categories to Tech's Realm forums; Tech's Realm Resources, Everything Tech, and Tech's Realm Off-Topic.
In Realm Resources, you will find announcements, news and website support. Everything Tech is geared toward the Professionals and Hobbyist. In Tech's Realm Off-Topics , this is a broad forum for various topics.
In Realm Off-Topics, there is a sub-forum for you to Introduce yourself to others, if you wish.
Click on any of the threads to make a comment or create your own thread topic for members to reply to your forum discussion.
To create a new topic thread, first choose the forum that your topic fits best. For simplicity and an example let's choose Tech's Realm Off-Topic to start your new thread.
When you click on Off-Topic Discussions/What's on your mind, you are brought to the page where all of the existing threads are viewable to reply too, or you can create your new topic.
Under the title page of this forum you will see the icon and clickable prompt to "create you're own new topic. Click on Post New Topic.

You now will see a space to write your thread title (there is a maximum character limit for thread titles) and a posting editor's box to write your main post to your new thread.
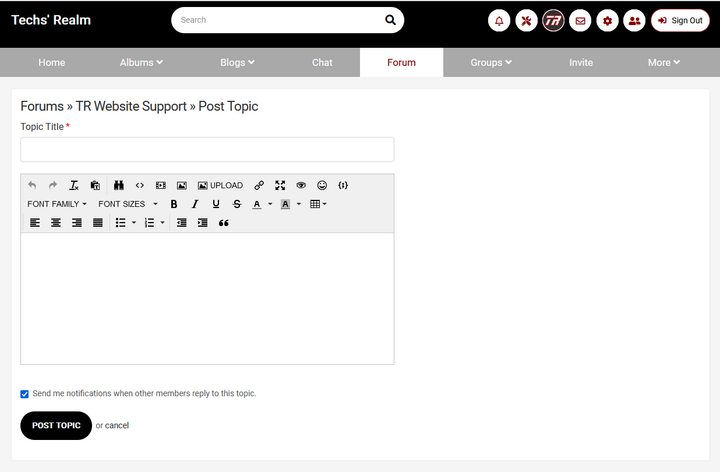
Create a catchy title and write your amazing post. Proof read your post, make any changes, then click on the button "post topic" and now you have created your new thread topic.
*If you are not too familiar with all of the features to use within your post editor's box, the best way to learn to see what each icon will do for you is press buttons.
 Though with that being said, be careful not to loose your post. If you are like me, there's nothing worse then loosing an amazing post when you click on the wrong button or forget that you weren't signed in and go to post and poof it's gone. To avoid such a tragedy, some pro's will type their post in Word and then copy/paste in the forum. I either do that, or before I click on post, I will copy my post before posting so I have what I wrote in my clipboard in case something goes wrong.
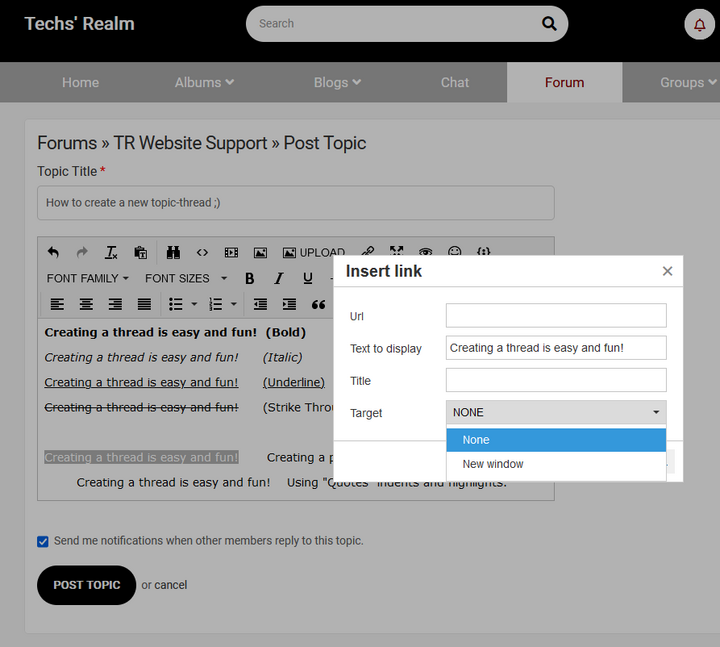
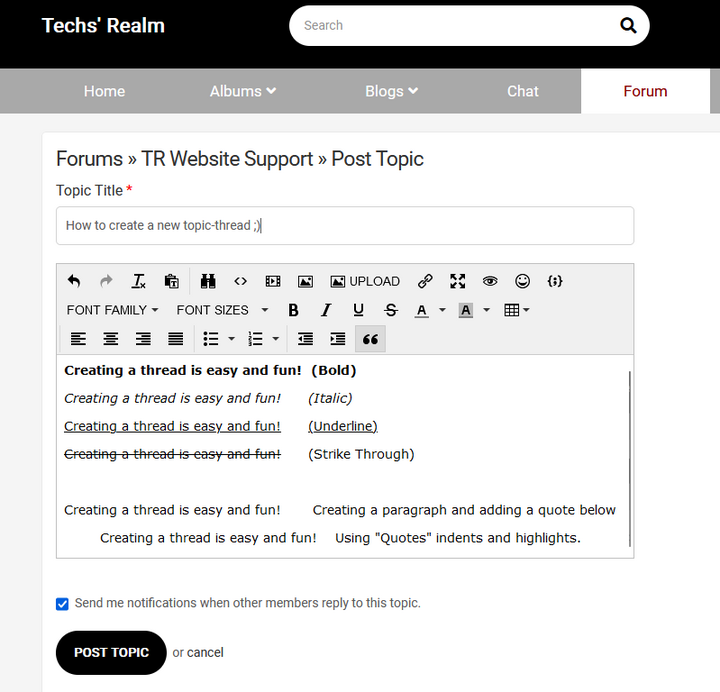
Here's a little tutorial on your post editor box. When utilizing these features in your post you can enhance your message, create a professional looking post with emphasis on certain areas of your text. Always be sure when you are quoting to use your quote marks. This will also indent and highlight your quote.
Icons used in editing a post top line (hover over the icon for name of icon):
Undo, Redo, Clear Formatting, Paste as Text, Find and Replace, Source Code, Insert Video, Insert Edit Image, Upload an Image, Upload a link, Expand to full screen (love this use all of the time), Preview, Emoji's, Insert/Edit Code Sample
Icons used for editing a post second line:
Font Family (see down arrow to choose), Font Sizes (see down arrow to choose), B (Bold text), I (Italic Text), U (Underline Text), S (Strike through) A (see down arrow choose text color), Table (create tables)
Icons used for editing a post third line:
Align left, Align Center, Align Right, Align Justify, Bullet List (see down arrow), Number's list (see down arrow), Decrease Indent, Increase Indent, Blockquote
Uploading links tip- see the icon that looks like a little sideways link next to the upload and picture icon. As a more professional option in your post, you can type out the title of the article you are linking too and embed the link within the text as opposed to showing the whole link. To do this, type the name of your article you want to link to, highlight the text, click on the link icon and you will have a box pop up. In the URL line, add your link. This will embed your link into your text.
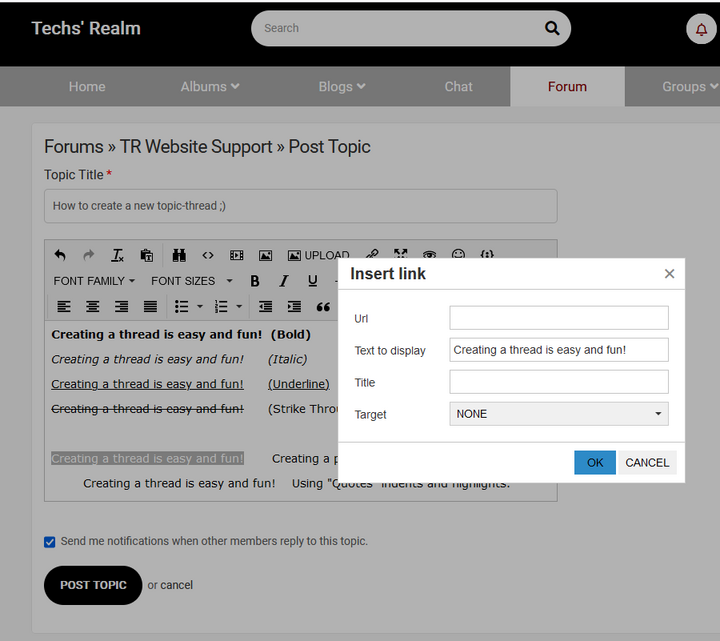
Before you are finished, you need to choose how you want your link to work. You will see "none" or "new window". I always choose "new window" so your viewers looking at your link will open your article to a new window (page/tab) rather then opening your article on the page you are on, thereby taking the member away from your post, out of Tech's Realm. You want your readers to be able to stay on your thread and open to another page for reading your article.
